Friday, September 17, 2010

Tail chop and new blinkers

So I finally got my tail chop kit after waiting for about two months. Super excited to get it on, so decided to be adventurous and try to install it myself. It was not super hard, but pretty tedious and time consuming- definitely some lessons learned in Italian engineering and design.

Also as I was installing the fender kit, I realize that the stock signals will not fit on the short tail given the fact that I installed the passenger bars a few weeks ago. So this meant going and getting new smaller signals - I was going to change those out anyway, but this just made it happen sooner. I looked at the Rizoma's but really liked how the Ducati performance ones looked and ended up with those. Anyway, its all installed and looks, I must say so myself, pretty good.

So what I got in the the fender kit-
- a plastic undertail
- short lock cable
- led number plate light
- European licence plate holder (metal)
- some hardware and brackets for signals
- NO instructions

With the LED signals
- Two signals
- wires with resistors
- plastic adapter to center it in the stock hole
- hardware
- instructions - YAY!... but mostly in Italian.


Lessons learned:
- DX and SX in Italian stand for right and left
- Red wires don't always connect with red wires, black wires don't always connect with black wires. (For the LED lights)
- Metal work will be required
- Don't expect any instructions.
- Wire harnesses SUCK!
- Short lock cables SUCK even more.

Some additional things I have received questions on and some high level instructions.

1: Take off the seat (duh!)
2: Remove 2 bolts in the tray which holds the toolkit
3: Remove the two bolts that hold the servo unit; disconnect the servo harness; move out of the way; Also disconnect the light harness.
4: Remove 4 bolts that hold the metal section on the top (tip: the bolts probably are marked from the factory (the yellow marker). Place or mark them to make sure that you put them back in the slot they came out from; that way you can align the lines back, especially if you don't have a torque wrench.
5: Remove the bolts with the rubber housing: you have to hold the bolts underneath while unscrewing the top
6: You can now remove the entire tail section.
7: With the tail section removed,
i. Undo the lock assembly (loosen the plastic nut with pliers, once it's loose, its easy to screw off.
ii. Brake light (you'll need a torx driver for this (think it was #20))
iii. Take off the signals, wires should be marked dx and sx, see above for what they mean

Assembling the DP tail kit:
1: Cut the Euro frame. If you cut the legs right below the two middle bolts you'll be good to go.
2: Install the LED plate light/ brake light; fairly straightforward
3: Install the lock (reverse of how you took it off)
4: Install signals; you will not use the stock bolts. This is where the right angle brackets go. One side acts as a spacer for the signal, the other side aligns with the hole where one of the bolts with rubber top goes. This supports the signal and makes them secure, otherwise the plastic is super thin there. You will use the bolts that came with the kit.
5: Lock cable: this is a pain the DP replacement lock cable is super short, so install it while you have everything open. When putting the section back on the bike, you will need some help to hold it there while you screw in the lock to the metal plate.
6: Put everything back together in reverse. Remember to thread the light cable and the servo through the metal plate before screwing everything together
7: Also make sure that there are no wires obstructing the servo; it could screw up your throttle response in neutral.


So here are some pics.

The hardware:

Tail kit


Signals.


Two tails together


The LED and the signal


The full chop

Saturday, September 11, 2010

Gear- Boots....

strongly believe in wearing some sort of protective gear when riding- a helmet, jacket, boots, gloves, back protector and some sort of knee/ leg armor. I've been lucky and have not had a bad crash, but when I "bit it", wearing good gear is what saved me a$$ - And having the right armor and the right fitting gear is key. I know tight fitting stuff seems like overkill or uncomfortable or you end up looking like you have just come off a race track, but when you go down, you don't want that armor moving. I'll throw up pics of what I wear with my thoughts, so starting off with shoes. I have two pairs, Sidi Vertigos (full boot)and Puma Flat v2 (half boot). I can't say enough good things about the Vertigos, they are comfortable when riding, have armor in all the right places, have an adjustable calf, so if you are wearing leathers or knee guards, etc., you can tuck them in, have couple of air vents for those hot days and just overall I think are the best riding boot out there. It is also cool that you can pretty much replace everything on the boot from the toe slider to the sole. :) In terms of daily wear, they are not designed for walking or hiking long distances. You can loosen the calf adjustment for walking, or wear them to work if you are a desk jockey but don't expect to run laps anywhere, anytime soon. The Puma's on the other hand are designed as an urban boot. I usually wear them when riding my scooter. Comfortable, but not much protection, more of a glorified high-top sneaker. They look good but I probably could have spent fifty bucks more and bought Sidi's streetburners. The pics: Sidi Vertigos Puma Flat V2.

Friday, September 10, 2010

Solo ride out

No new upgrades, just a few pics from a ride last week.
Still getting used to the passenger bars ;)


Friday, September 3, 2010

Grab bars....

Got the rear passenger grab bars today (still waiting for the fender kit), and just so everyone know, they did not come with any hardware or instructions. I didn't realize that they are and stick out a bit from the rear but are designed well and do not detract from the lines of the bike. Lets see if these grow on me otherwise I may have to take them off.

The install was fairly simple. #5 hex key to take off the two bolts that connect the rear exhaust to the frame, take out the spacers and fit the bars in, using the same hardware. You then need on M6 bolt (not included) to connect the last part of the bar to the frame and that is it.

Some pics:

The bar and the bolt that does not come with it


The two bolts that need to come out.


Installed


With the seat on


Sunday, August 29, 2010

Ride to the coast

Rode out to the coast today on the monster taking some back roads, including a one and a half lane side road used mostly by ATV's and off-roaders (it was paved), but had to keep a look out for riders crossing the road at any point. 70 degree weather throughout and the bike, as expected, was fun to ride. I do need to remember to let it get to temp before taking off, however, as it does tend to spit and sputter when cold.

Pic for the day.

Friday, August 27, 2010

79.6

Yes that was the mileage on my trip meter today as I parked the bike at work :)


Even spiders like Monsters

Wednesday, August 25, 2010

Puma

I'm not big on stickers and decals on bikes, but the one I have on all my bikes is a Puma logo. Somehow I just like the look.


BTW, still waiting for the fender kit and the passenger handles, both have been on order for about a month now.

And just for fun, the other two cats....


Friday, August 13, 2010

848 today

After about a week of riding the monster, I took the 848 to work today and WOW!- the bike felt completely different. Guess I did not feel the difference when that was the only bike I was riding. Power; I can tell it is a superbike, even though the engine size is about 50 cc more, the water cooled, 4 valves and the 134hp vs. 87hp make an impact. Steering was super focused as well, slight adjustments, pressure on the handlebars and away it goes. I don't feel like I move around on the seat as much on the monster and I really need to on the 848. Anyway, it was cool to experience the different bikes.

Thursday, August 12, 2010

Painted calipers

Similar to the 848 the 796 does not come with the painted Brembo calipers, so took out the touch up paint for my red vespa and here you go.

Before:


After:


And some more details:
Tank closeup


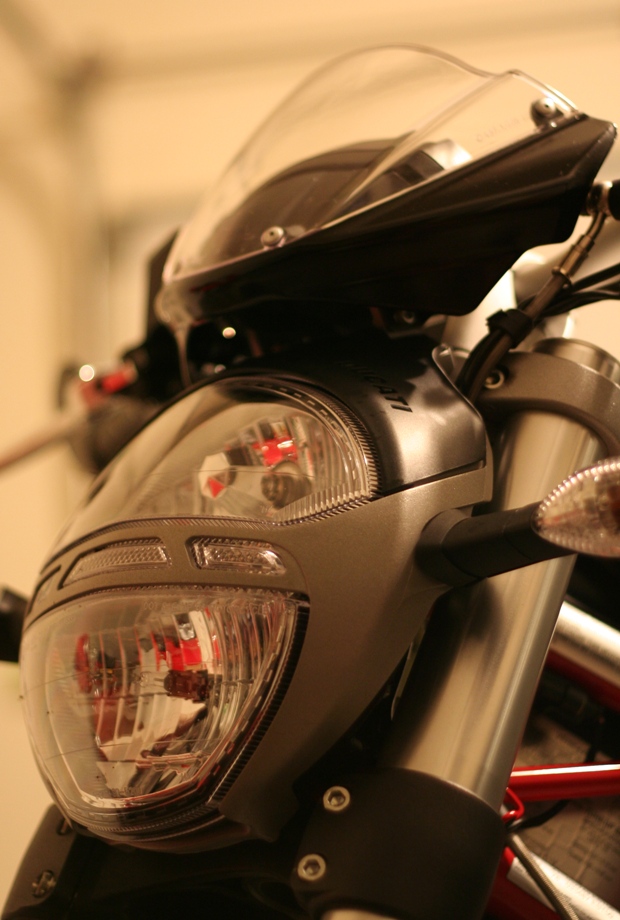
Headlight

Commuting

Have not commuted much on the Monster yet, but in traffic, the exhaust does get hot! - Hot enough that if you are not careful you could burn. Think somone needs to come up with better heat shields for it. Other option, getting ceramic coating on the pipes. Will see what comes on the market, otherwise this will make for a good winter project.

Monday, August 9, 2010

First 1000 miles

I have had my M796 for about two weeks now and am nearing 1000 miles (that included a ~700 mile trip up to Canada). As the miles have racked up, its running a bit smoother, even at the lower rpms, but again, it is happiest in its power range of 5-8k rpms, although I have not really pushed it too much at the higher end, given the break in period.

600 mile service (@about 800 miles) was done last week - included an oil/ filter change, cleaning of the oil screen, chain was way loose to tightened it up. That was about it. Cost $160.

In terms of mods, the mirrors have been replaced by bar ends. And waiting for the fender eliminator kit to get here. There are a few more mods I'd like to do, but at this point think this will be it.


middle of the road again.....

Sunday, August 8, 2010

Close ups

Pics of some of the details, from the instrument cluster to the detail stitching on the seat and the 796 decals.